What Are Scientific Method for Kids
In this post, we’ll explain the scientific method for kids in plain language. You’ll get the steps of the scientific method, classroom examples, and easy science lab ideas. We’ll also show how it connects to NGSS science practices.
Every great discovery starts with a question. Why is the sky blue? Why do plants bend toward light? The scientific method for kids makes answering questions like these simple and fun.
Whether you teach 3rd grade or middle school, this guide will help. Let’s dive in.
What is the scientific method for kids?
The scientific method is a step-by-step way to explore questions about the world. Scientists use it every day. Kids can use it too — in the classroom, at the science fair, or at home.
Here’s the simplest way to say it: ask a question, make a guess, test it, and see what happens.
That’s it. Everything else is just adding detail to those four ideas.
Steps of the scientific method for kids
You may see 5 steps, 6 steps, or 7 steps of the scientific method in different textbooks. Don’t worry — they all describe the same process.
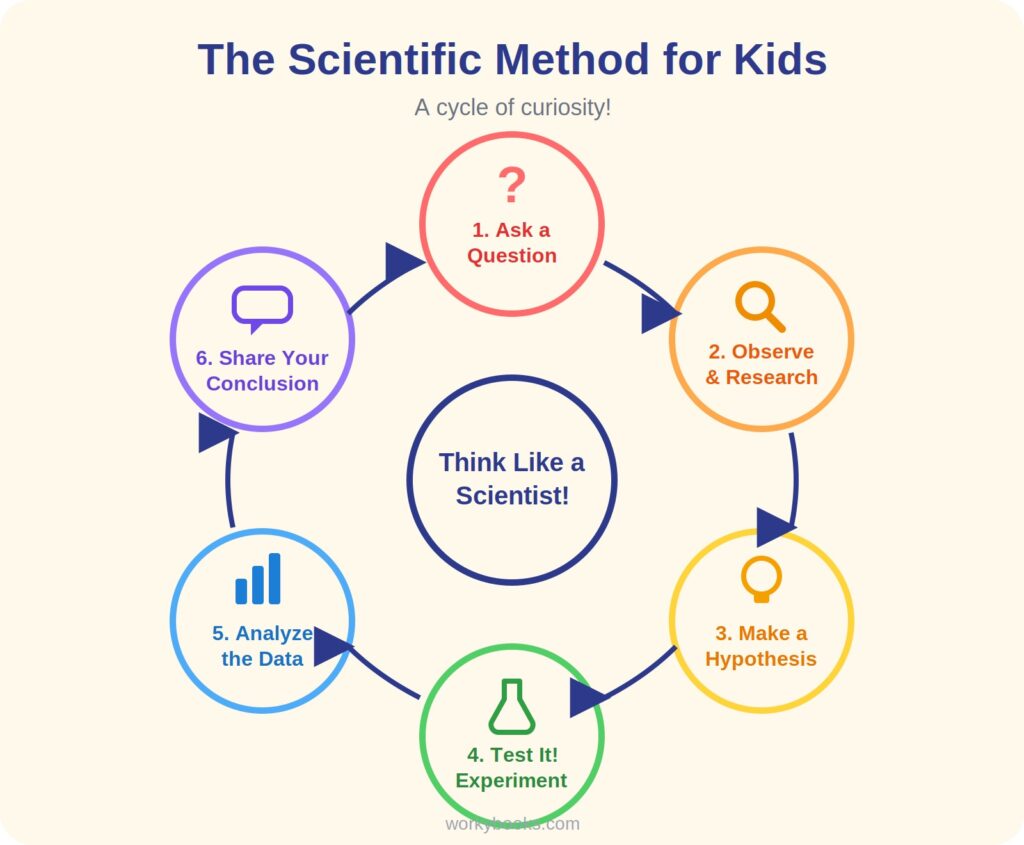
1. Ask a question
Every investigation starts with curiosity. Good questions are ones you can test. “Which paper airplane flies farthest?” is a testable question. “Are airplanes cool?” is not.
2. Make an observation and do research
Observation means using your senses to gather information. Students look, listen, measure, and take notes. They can also read about the topic first.
3. Form a hypothesis
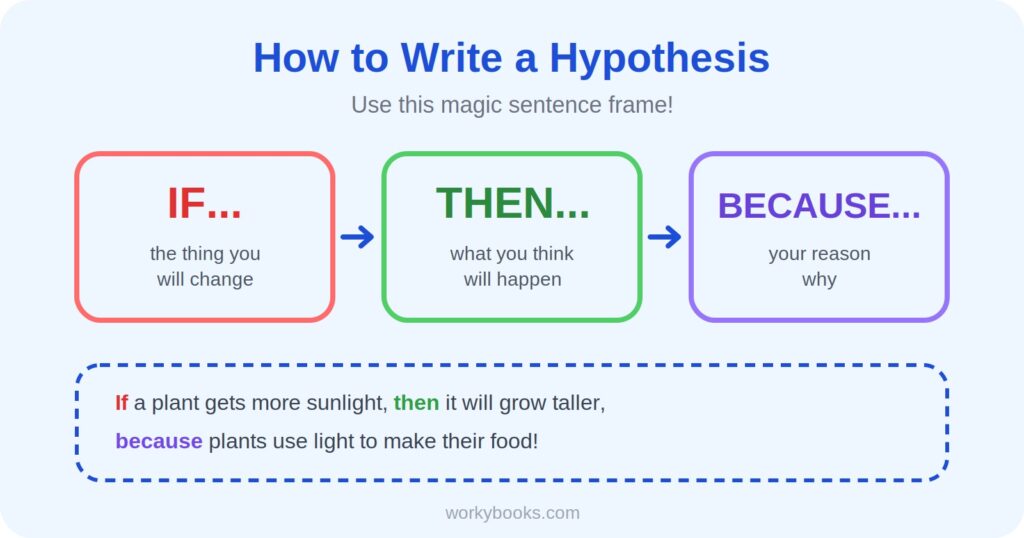
A hypothesis is a smart guess you can test. Teach kids the classic sentence frame: “If ___, then ___, because ___.”
Example: “If a plant gets more sunlight, then it will grow taller, because plants use light to make food.”
That’s how to write a hypothesis in one easy sentence.
4. Test with an experiment
Now comes the fun part. Students design an experiment to test their hypothesis. This is where variables come in.
- The independent variable is the one thing you change.
- The dependent variable is what you measure.
- The control group stays the same, so you have something to compare.
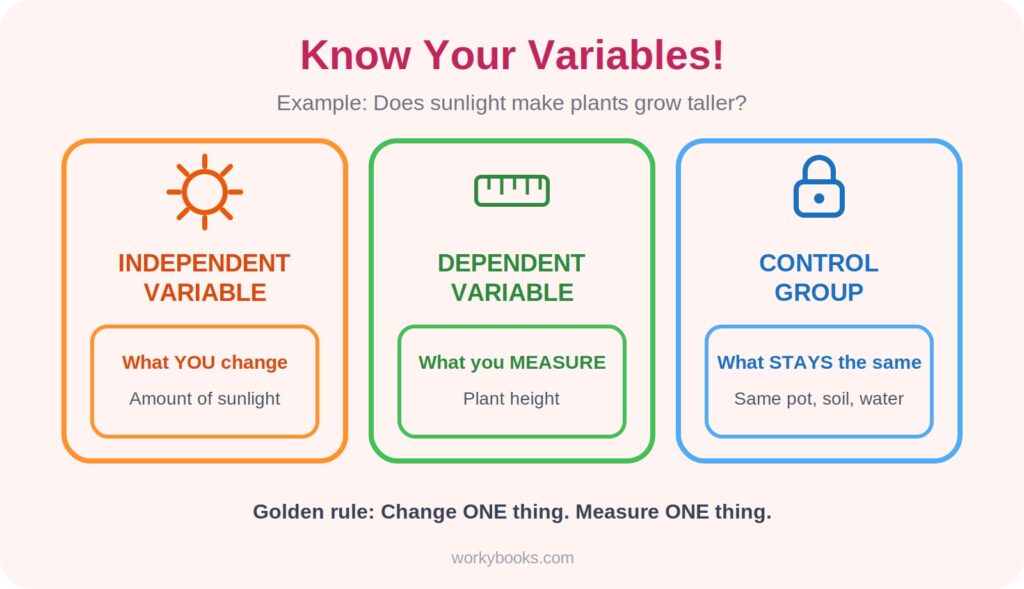
Keep it simple for younger kids: change one thing, measure one thing.
5. Analyze the data
Students record their results in a chart or table. Then they look for patterns. Did the plant with more sunlight really grow taller? The data tells the story.
6. Draw a conclusion
Finally, students decide if their hypothesis was supported. Then they share what they learned. Real scientists share their results too — that’s how science grows.
A common misconception: “wrong” hypotheses are failures
Many students think a rejected hypothesis means they failed. Not true! In science, a surprising result is still a result. Scientists learn just as much when a prediction doesn’t work out.
Remind your class: the goal is to learn something, not to be right. This mindset builds confidence and real scientific thinking.
Another misconception: the scientific method is a rigid checklist. Real scientists loop back, revise, and test again. It’s more of a cycle than a straight line.
Observation vs. inference: a quick mini-lesson
This trips up a lot of students, so it’s worth a moment.
- An observation is what you notice with your senses. “The grass is wet.”
- An inference is an explanation based on observations. “It probably rained last night.”
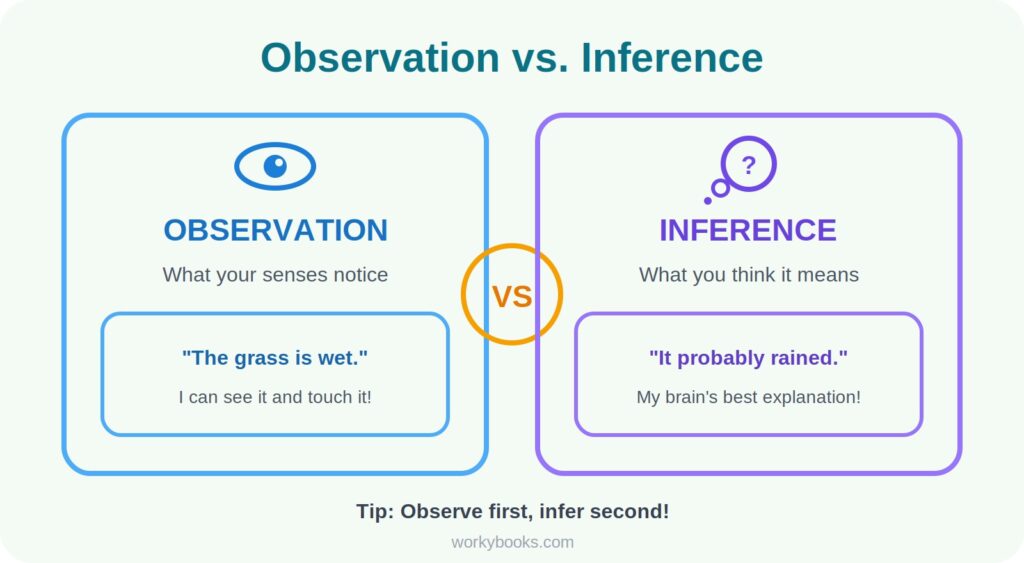
Try this quick activity. Show a picture of muddy footprints by a door. Ask students to list observations first, then inferences. It takes five minutes and sparks great discussion.
Easy scientific method experiments for kids
You don’t need a fancy lab. These easy science experiments use the scientific method with everyday materials.
Elementary (grades 3–5):
- Paper airplane test: Does wing size change flight distance? Fold, fly, and measure.
- Sink or float: Predict which objects will float, then test them in water.
- Celery and food coloring: How does water travel through a plant? Watch the color climb.
Middle school (grades 6–8):
- Paper towel strength: Which brand holds the most weight when wet? Great for controlled variables.
- Dissolving race: Does water temperature change how fast sugar dissolves? Time it.
- Bouncy ball drop: How does drop height affect bounce height? Measure and graph the results.
Each one works as a science lab, a science fair project, or a quick class demo.
How the scientific method connects to NGSS
The Next Generation Science Standards (NGSS) don’t list “the scientific method” as a single standard. Instead, they describe eight Science and Engineering Practices. The good news? They line up beautifully.
- Asking a question → Asking Questions and Defining Problems
- Making a hypothesis and testing it → Planning and Carrying Out Investigations
- Analyzing data → Analyzing and Interpreting Data
- Drawing conclusions → Constructing Explanations and Engaging in Argument from Evidence
So when you teach the scientific method, you’re building NGSS science practices at the same time. Frame it as flexible inquiry, not a rigid recipe, and you’re fully aligned.
How to teach the scientific method: tips that work
Here are a few teacher-tested ideas for your scientific method lesson plan.
- Start with a hook. Do a surprising demo first, then ask, “What do you think happened?”
- Use an anchor chart. Post the steps on the wall so students can reference them all year.
- Try a graphic organizer. A scientific method graphic organizer helps kids record each step as they go.
- Practice vocabulary. Words like hypothesis, variable, data, and conclusion need repeated exposure.
- Repeat with new questions. One experiment isn’t enough. The process sticks through practice.
For assessment, mix it up. Use a quick scientific method quiz, an exit ticket, or a full lab write-up.
Ready-to-use scientific method worksheets and activities
Want to skip the prep work? Workybooks has a growing library of standards-aligned science resources for K–8.
You’ll find scientific method worksheets, reading passages, graphic organizers, and interactive activities. Everything is aligned to grade-level standards and ready to print or assign digitally. There are also science games and quizzes to review vocabulary the fun way.
Explore the science collection at workybooks.com and make your next science lesson the easy one.
Quick recap
- The scientific method is a simple cycle: question, hypothesis, experiment, data, conclusion.
- A “wrong” hypothesis is still good science.
- Hands-on experiments make the steps stick.
- Teaching the process builds NGSS science practices naturally.
Now hand your students a question and let them investigate. Curiosity will do the rest.
Related Posts